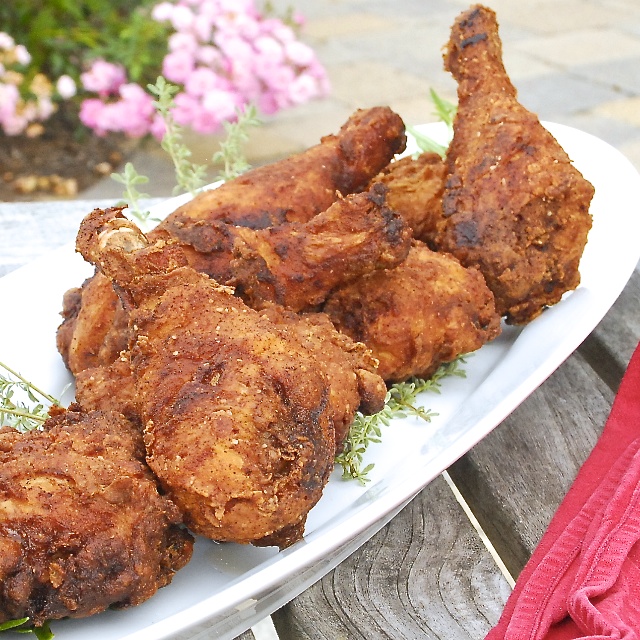
Many of you may recall that when I posted David Chang's "Momofuku's Fried Chicken" a while back I said I'd be back soon with an honest to goodness buttermilk fried chicken recipe. Well here it is, thought it comes to us not from America's deep south, but rather by way of one of my favorite chefs, Thomas Keller, and the gang at his Ad Hoc Restaurant in the Napa Valley.
While I have been a fan of traditional, batter coated fried chicken for years, I never endeavored to make it myself until now.
Why?
Because it just sounded like too much work and mess for the potential reward. Flash frying things like french fries or popcorn shrimp is one thing. There the higher temperature frying cooks the product through and provides a crisp coating without a lot of fuss. Cooking larger pieces of meat however, like this chicken, requires that you cook at a lower temperature to ensure that you don't end up carbonizing the coating in the time it takes to cook the meat through, and therein lies the challenge to this type of frying. Cook on too low a temperature and your coating will absorb too much oil and never crisp properly, too high a temperature and the coating burns before the meat cooks through.
Look at me, such a scaredy cat…..here, kitty kitty.
My worries were for nought however, because given the proper equipment, maintaining the correct frying temperature requires just a little attention. And the rewards for your diligence in frying? Most likely the best fried chicken you've ever had….anywhere! The equipment needed is pretty straight forward, a responsive and reasonably powerful cooktop (a heavy duty gas cooktop, a ceramic or an induction is perfect), 1 or 2 fry thermometers, and 1-2 large, deep, heavy bottomed pots is all you need for frying success.
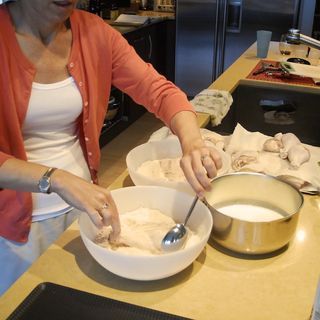
 Once you've got your equipment pulled together, you can leave it to Keller to drive you home in style. The key to any great fried chicken is juicy, well seasoned meat encased in a light, crisp-tasty coating. To tackle the first requirement, Keller has you soak the bird in a lemon-garlic-herb brine for 8-12 hours. This ensures that the meat stays moist when fried and is seasoned down to the bone. Then, he has you coat the pieces first in a well seasoned flour mix, then some buttermilk, and finally some more of the seasoned flour. This is to give you an elegantly light, yet flavorful and crisp crust.
A little advance planning is necessary for this dish because in order for the chicken to have enough brining time you must start it soaking in the morning, and that requires that you make the brine a day in advance so that is can be refrigerated and cold by the time you set the meat in to soak.
A final note….we followed his recipe to the T, and had one of the best meals I can remember having in a LONG time. We set up two pots, one for dark meat pieces (at 320℉) and one for white meat pieces (at 340℉), and while everything cooked perfectly, it was a bit of a challenge maintaining two different frying times and temperatures. That said, and given the fact that we are dark meat lovers around here, the next time I may simplify things a bit further and cook just thighs and legs, this allowing the use of just one pot cooking at one temperature.
Don't be a scaredy cat like me, go cook this insanely good dish NOW!
Cheers – Steve
Ingredients
- Two 2 1/2- to 3-pound chickens
- Chicken Brine, cold (recipe follows)
- Peanut or canola oil for deep-frying
- 1 quart buttermilk
- Kosher salt and freshly ground black pepper
Coating:
- 6 cups all-purpose flour
- 1/4 cup garlic powder
- 1/4 cup onion powder
- 1 tablespoon plus
- 1 teaspoon paprika
- 1 tablespoon plus 1 teaspoon cayenne
- 1 tablespoon plus 1 teaspoon kosher salt
- 1 teaspoon freshly ground black pepper
- Ground fleur de sel or fine sea salt
Brine:
- 5 lemons, halved
- 12 bay leaves
- 1 bunch (4 ounces) flat-leaf parsley
- 1 bunch (1 ounce) thyme
- 1/2 cup clover honey
- 1 head garlic, halved through the equator
- 1/4 cup black peppercorns
- 2 cups (10 ounces) Diamond Crystal kosher salt
- 2 gallons water
Instructions
- Cut each chicken into 10 pieces: 2 legs, 2 thighs, 4 breast quarters, and 2 wings.
- Pour the brine into a container large enough to hold the chicken pieces, add in the chicken, and refrigerate for 12 hours (no longer, or the chicken may become too salty).
- Remove the chicken from the brine (discard the brine) and rinse under cold water, removing any herbs or spices sticking to the skin. Pat dry with paper towels, or let air-dry. Let rest at room temperature for 1 1/2 hours, or until it comes to room temperature.
- If you have two large pots (about 6 inches deep) and a lot of oil, you can cook the dark and white meat at the same time; if not, cook the dark meat first, then turn up the heat and cook the white meat. No matter what size pot you have, the oil should not come more than one-third of the way up the sides of the pot. Fill the pot with at least 2 inches of peanut oil and heat to 320°F. Set a cooling rack over a baking sheet. Line a second baking sheet with parchment paper.
- Meanwhile, combine all the coating ingredients in a large bowl. Transfer half the coating to a second large bowl. Pour the buttermilk into a third bowl and season with salt and pepper. Set up a dipping station: the chicken pieces, one bowl of coating, the bowl of buttermilk, the second bowl of coating, and the parchment-lined baking sheet.
- Just before frying, dip the chicken thighs into the first bowl of coating, turning to coat and patting off the excess; dip them into the buttermilk, allowing the excess to run back into the bowl; then dip them into the second bowl of coating. Transfer to the parchment-lined pan.
- Carefully lower the thighs into the hot oil. Adjust the heat as necessary to return the oil to the proper temperature. Fry for 2 minutes, then carefully move the chicken pieces around in the oil and continue to fry, monitoring the oil temperature and turning the pieces as necessary for even cooking, for 11 to 12 minutes, until the chicken is a deep golden brown, cooked through, and very crisp. Meanwhile, coat the chicken drumsticks and transfer to the parchment-lined baking sheet.
- Transfer the cooked thighs to the cooling rack skin-side-up and let rest while you fry the remaining chicken. (Putting the pieces skin-side-up will allow excess fat to drain, whereas leaving them skin-side-down could trap some of the fat.) Make sure that the oil is at the correct temperature, and cook the chicken drumsticks. When the drumsticks are done, lean them meat-side-up against the thighs to drain, then sprinkle the chicken with fine sea salt.
- Turn up the heat and heat the oil to 340°F. Meanwhile, coat the chicken breasts and wings. Carefully lower the chicken breasts into the hot oil and fry for 7 minutes, or until golden brown, cooked through, and crisp. Transfer to the rack, sprinkle with salt, and turn skin side up. Cook the wings for 6 minutes, or until golden brown and cooked through. Transfer the wings to the rack and turn off the heat.
- Arrange the chicken on a serving platter. Add the herb sprigs to the oil (which will still be hot) and let them cook and crisp for a few seconds, then arrange them over the chicken.
Chicken Brine: makes 2 gallons
- Combine all the ingredients in a large pot, cover, and bring to a boil. Boil for 1 minute, stirring to dissolve the salt. Remove from the heat and cool completely, then chill before using. The brine can be refrigerated for up to 3 days.